Thursday, 9 December 2010

Final Renders

At first I had a lot of difficulty getting this right. Textures for some unknown reason were not showing, instead they'd be rendered black. Nevertheless I countered this by changing the file type from jpeg to bmp, and all was sorted. The textures after this worked perfectly fine and I was able to continue my work.
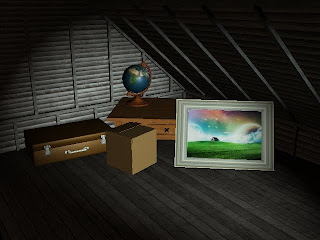

This is the first render, where the objects appear new. The globe and the suitcase both act on the light and reflect. this is because the globe is a plastic material, so it would naturally have some glossiness. Same goes for the leather. Of course the wooden table and cardboard box are not, so they were Lamberts naturally. The painting is old anyway, most painting in houses are, that is why I didn't allow it to reflect, I left it as it is.


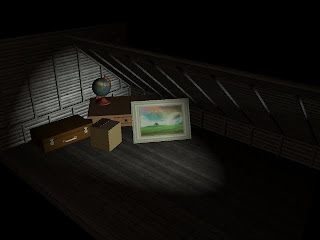
Now the objects have discoloured over time and aged. It is apparent that they have been there for some time. The lights were exactly the same, so they have no effect over the objects here. I had thought about altering the lights, to exaggerate the ageing process they would have taken. But then it would seem that I could have just done that in the first place. Though of course without the same effect as actually changing the object. I wanted to fully show how the objects here had changed. Therefore, the lights stayed the same.


I had though about having several renders showing the progression of objects placed in the attic, but I thought it would have been more simple to have all objects in the attic together, before and after. Otherwise, the way I would've gone about it, it would've been better to make a video. I had initially intended to make a video however, but I wanted to focus more on the modelling and texturing, spending all my time on that.

Placing the assets in the attic


I have situated my objects in the the attic scene, and placed them in the corner of the room. I know attics are usually either packed or very untidy but I only had a few objects and I needed to separate them in order for them to be seen clearly for the camera.


This is the same scene, but with the old looking assets. Exactly the same except they either have different textures or different nodes, or both.


I created a plane and made a hole using a cube and Boolean to simulate a window. I tried to replicate the moonlight shining through the window. I did not accurately create this, but I am not specialising in lighting and my aim was only to light the objects in my scene. I used a spotlight for this and gave it a slight tint of light blue.

I also added a point light, with a brown tint, to make the walls and floor look less dull and grey. It shows too, the colour helps.


Wednesday, 8 December 2010

Assets Comparison - Aged


Here is the comparison between all my assets, old and new. Ultimately, I have either added a coloured layer with low/half the opacity in Photoshop, changed the node, or changed the actual texture. With the painting though, I created some discolouration on the edges, it actually brings forth the frame too, which is quite nice, looks a lot less flat.

The table and box only had a coloured layer over them, same with the painting, beside the aforementioned discolouration. The globe had this also, but the stand on which it sits has a new texture; a similar, but darker, and slightly redder one. It gives the impression it has discoloured over time. The suitcase was just a simple change of the node, from Blinn to Lambert, as mentioned in the previous post.

Suitcase Comparison

I duplicated the suitcase, created a Lambert node and assigned the texture to this new node. Before I did not realise I could assign textures to multiple nodes. It proved quite useful and made my Hypershade Work Area a lot more cleaner to work with.

The one on the right is Blinn, the left is the new Lambert model. Already there are differences between them both. The Blinn model has a line of light running along the front edge and the top overall glows a little more than the Lambert model, which is plain all over.


I added a point light in the scene, getting a better perspective of the comparison between both models. There is a vast difference now. The Lambert model remains as dull as before, but the Blinn model recognises the light much more now. There is even a thin streak on the handle. It looks more like leather now as well, it has a nice shine to it.


This is the screen capture I took of my Hypershade window showing the files assigned to multiple nodes. I did it with all four textures for this scene. It proved very useful and saved filling the work area with too many files and nodes, etc.

Suitcase Textured

It is now textured and it is looking far better than the previous model would have looked. The clips look relatively okay, and although the handle does not rotate, it is still acceptable. Though perhaps in the final scene, I will change the colour of it to light brown, to match the rest of the suitcase.
The Clips and the parts the handle are attached to have scratched metal textures on them. The two pieces attached the the bottom however, also have screws textured on them. They are slightly noticeable.
I believe this to be a decent model.

Suitcase Remodelling

I had enough with the previous model, and created a new one, proving much easier to model. I had followed the basics from this image with the red suitcases, but made it more of my own. So I basically kept the original size of it.


I first modelled the bottom part simple enough, then duplicated and rotated it to sit on top of the bottom part. Both were bevelled.

Then I began modelling the clips that fasten the suitcase. I used boolean on the vertical piece, though really, it is not even noticeable in this render, nor will it be in the final render, but I wanted to be in control of my model, so that it worked okay.


Just the suitcase opened, to get more of an understanding of how it look from different angles. I didn't bother to make the hinges on the back as they will not be seen on camera, it was unnecessary to model them.


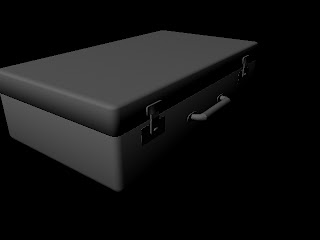
This is the final suitcase before texturing. The handle has been added. Not perfect, but it will have to suffice.

Suitcase

I tried to model a suitcase from this image, though it went horribly wrong. I had tried modelling it as one whole object rather than two separate ones; the top and the half. The textures weren't half bad either, though the darker one was not tiled, so would have looked very odd, as you can see on the side of the suitcase in the render.