Sunday, 5 December 2010

Plywood Flooring


I was testing this to see if I could use it in the attic scene, and I was using a cylinder again as reference to a human. After making this I don't believe that I'd like this Plywood to be in the scene. Floor boards would be a lot more appropriate.


A close-up with another bump map added to it. I still does not make is suitable for the attic scene I believe.

Globe


This is the globe I will likely be using in my final piece. I modelled it after the globe here. My texture of Earth though, not a representation of Earth, which is how Globes tend to usually be. nevertheless, it still works fine.


This is the same model, but with less polygons, and it is pretty much exactly the same as before. Therefore, I am saving myself polygons and rendering time, but still getting the same effect.


I chose to texture the base with wood, rather than plastic. I chose two textures that were suitable, and I think I could use them both. When I begin to age my objects, I can simply switch the texture from the one on the right, to the one on the left, to show it's aged/gotten dirty and dusty.
However, I am yet to use the UV Texture Editor to scale these textures to how I want them.

Cardboard Box


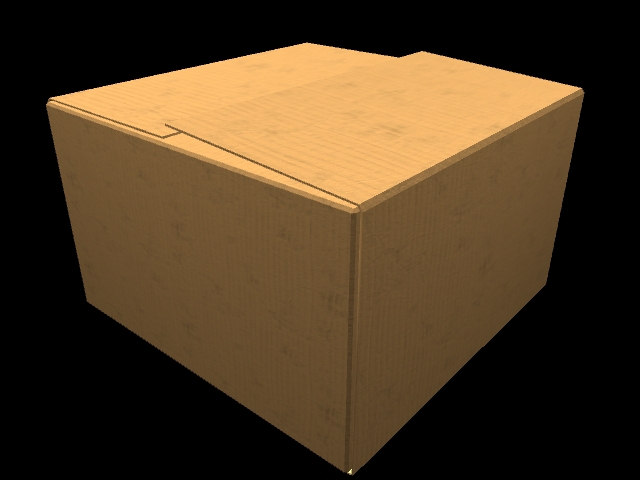
Just a simple cardboard box I made. At firs I created the box but was unsure how to create the overlapping folds of the box. So I made a plane that surrounded the box and made each end folds on top of the box, covering the non-existent folds underneath.
the same texture is applied all over the box though. It is not bad, but could be better, with a different texture perhaps.

Brick Wall

I tried to replicate a brick, none specific, but anything that looked a little realistic. After looking at it though, it could do with some lighting to add to the effect, help bring it to life. However I am not specialising in lighting, though I will have to look into and use it from time to time to help with my scenes.
I added a bump map to help achieve this as well. It can look to grainy or just plain wrong if the setting are too far either way across the slider, so I had to tweak it a few times to find a decent one.


A render from this angle shows that the texturing could have been better. The way it is laid across the corner isn't very nice. It looks as if the brick is very thin. Though really, I should not be using the texture on top of the wall as I have on the front.
I did this as a test for myself, just to see if I could create it.

Table Model


This is the table I didn't texture. I wanted to see how detailed I could make it without using a texture and just by modelling. The modelling is noticeable. I used an image for reference, and modelled based off of that. though I now notice I have missed certain parts, such as the bolts in the legs and on the top of the table. I did however manage to get the detail on top, where it looks like it is separating with the lines towards the outside.


Here is a close up of the top. you can see more of the detail, and some more on the side also. I had only given the model a colour, still no texture. Although it looks very basic and too clean.


I re-modelled the table, but it was very simple. The top of the table itself only has 6 sides. I had to extrude the main body of the table also, otherwise it would have looked very flat.
I applied a bump map too, by opening the image in Photoshop and making it a grayscale image.


I found a new texture on www.cgtextures.com and applied it to the table. Again, I added a bump map to it, so it isn't so flat, and makes it look more 3D and believable. I believe it is an improvement on the last render.


Thursday, 18 November 2010

Wooden Boards


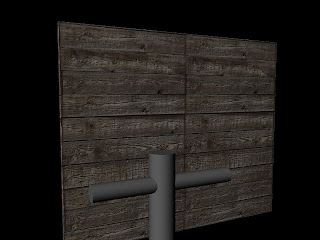
This texture is from http://www.cgtextures.com/ where I have gathered a few other textures as well. I have tried using mainly tile-able textures, making it easier to scale up the texture without getting the awful tiled texture look all over my assets.

Here though, the image is very flat.


The two cylinders in the scene here are just for my own reference of a person with their arms spread out, so I could get a semi-accurate size of the boards of wood.


I have added a bump map by going altering the original image as a grayscale image and saving it as it's own image, then importing it into Maya and connecting it to the material as a bump map.
By doing this, I can pull out either dark or light parts of the grey image, but the effects will appear on the asset itself.

From there it was just a matter of finding which point was best. I have made it now look more 3D.

Water Sphere

I made this as a little test, seeing if it would be convincing enough. The texture is good, however I did have trouble making it look real as at first it looked solid. So I increased the transparency to make it look less like a solid object.


Then I moved the cube closer, to get a nice reflection from the sphere as well to further make it look more authentic. Though, it is not perfect.